How to add eSIM to iPhones?
Here, we explain how to add eSIM to iPhones in minutes using a QR code.
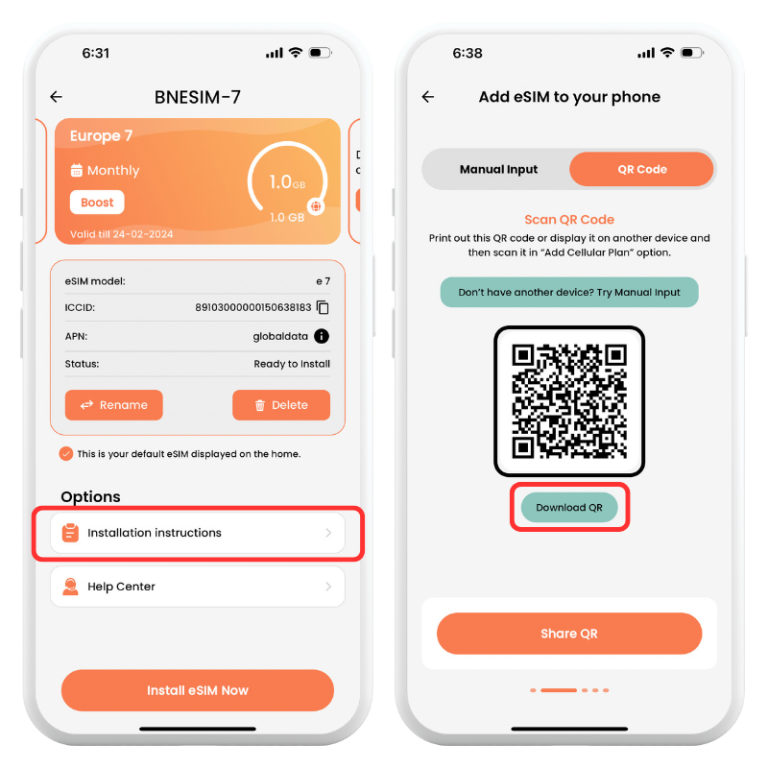
Open the BNESIM app.
Click My eSIMs.
Click the eSIM you want to install.
Click Installation Instructions.
Swipe right, and you will find your QR code.
Click download QR Code.
Exit the BNESIM app, then Go to Settings.
Click Cellular or Mobile.
Click Add eSIM.
Click Use QR Code.
Use your printed QR code or another device that displays the QR code to scan your eSIM QR Code
Click Continue twice.
Wait a few minutes for your eSIM to activate.
Click Done.
Label your eSIM
It is always useful to label your eSIM as “BNESIM” for easy identification and avoid confusion.
Click Secondary.
Enter BNESIM or your preferred label.
Click Done.
Click Continue.
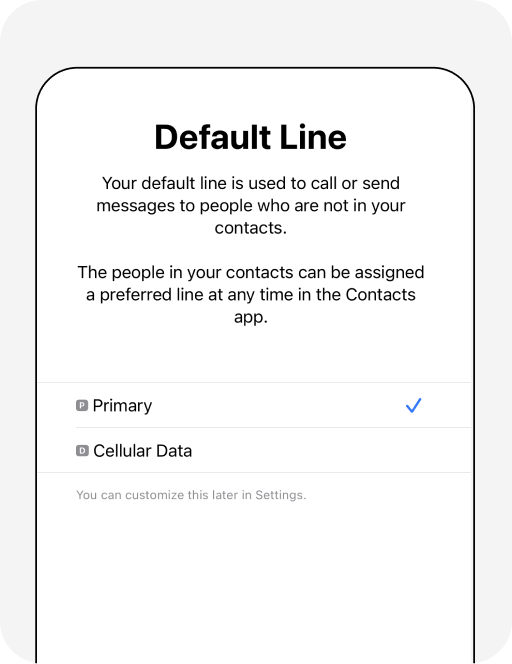
Choose primary as your default line
For calling, FaceTime, messaging, iMessage
Start using your eSIM data
Choose Secondary “BNESIM eSIM” as secondary for cellular.